
|
|||
|
Jeep FAQ How-To Articles Quick Reference Product Reviews My Buildup Random Home |
Changing a thermostat in a Jeep is actually quite simple. The first step is place a drain pan under the Jeep. Even with the drain pan odds are high you will make a bit of a mess. You have a couple options here. 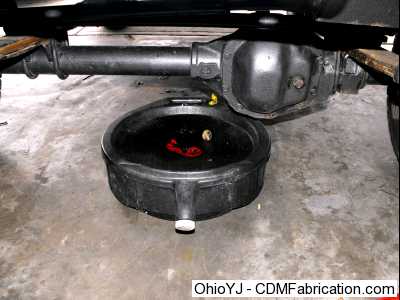
Option 1: You can drain the radiator some, to help prevent some spillage when removing the water outlet. My advice is to NEVER touch the drain on radiators. When they work it makes the draining the radiator slightly less messy. However odds are much higher the drain will break, or never seal again. Just remove the lower hose. Usually you can loosen the hose clamp and pull the hose back some, till antifreeze starts to trickle out, and wait for it to drain. Option 2: I chose just to remove the water outlet without draining the radiator. While it is slightly messier it makes the whole process quicker. Since it was raining, and dark out, I'd prefer the quickest way. However don't remove the water outlet yet. Removing the serpentine belt is not necessary, but it does get it out of the way. I chose to leave the belt in place. For YJs and early TJs, you can use this writeup to remove the belt. Later TJs just use a spring tensioner. First unplug the coolant temperature sensor, and remove the heater hose, and upper radiator hose from the water outlet. There are two bolts that hold the water outlet on, pictured below. Remove these two bolts. For the bottom bolt, you'll have to hold the belt out of the way if you chose to leave it on. If your water outlet hasn't been off in a while, it maybe stubborn, don't be afraid to place screw driver handle in the end of it to pry it off. It shouldn't take a bunch of force though, if you are really having to pry, stop and double check that you have removed the correct bolts, and nothing is in the way. 
Using a gasket scrapper, clean the water outlet, and the mounting surface on the cylinder head. Get it as clean as you can. Then wipe both sides down with brake cleaner. This is one of those things, once you think it's clean, clean it one more time. 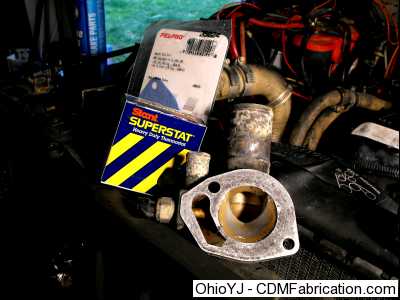
Next lay a bead of silicone down on the inside of the bolt holes, then smear it across the whole surface with your finger. It doesn't take much silcone, less is more here. 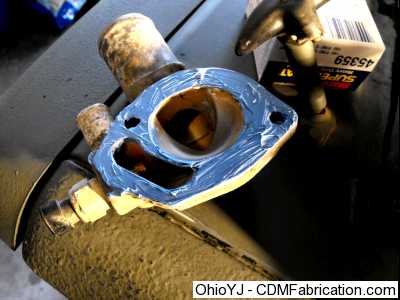
Next lay the gasket down on the water outlet, and lay another bead around it inside of the bolt holes. Then smear that bead around with your finger. Again less is more, it doesn't take much silicone. 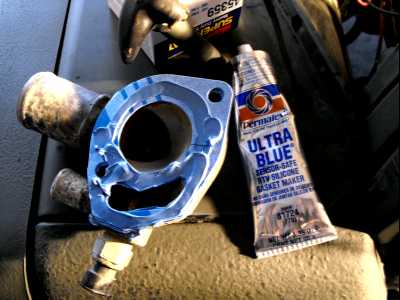
Next check the thermostat to see if it has a bleeder (the little brass button in the picture below). These allow air to escape, and must be at the top of the thermostat. Make sure it's at the top when installed. 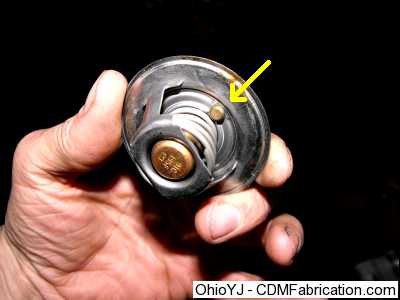
Next place the thermostat in the motor. A dab of silicone will help hold it in place. 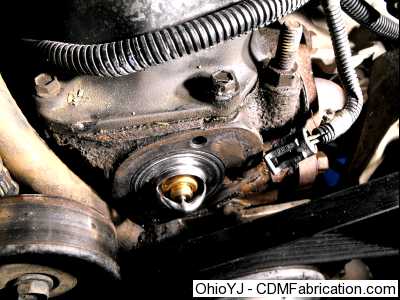
I've found it's easiest to place the bolts into the water outlet housing to line things up. Then place the water outlet on the head, and start the bolts by hand. 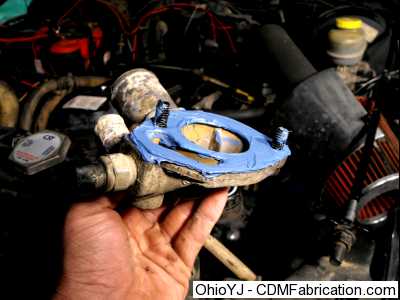
Now remember these aren't lug nuts, these bolts do not need to be super tight. Use a small ratchet, and tighten them down evenly. Then reattach the upper radiator hose, heater hose, and plug in the coolant temperature sensor. Give the silicone 10 minutes or so to set up. Refill the radiator, but leave the radiator cap off. Start the Jeep and let it warm up some, adding coolant as necessary. Once it's warmed up and the thermostat has opened you can put the radiator cap back on. Double check for leaks. If everything looks good, take it for a drive. After it cools back down from the test drive, check the coolant level one more time just in case.
© Copyright 2006 - 2025 Mike Lee
|
|
|