
|
|||
|
Jeep FAQ How-To Articles Quick Reference Product Reviews My Buildup Random Home |
A motor mount lift is designed to improve the rear driveshaft angles. It does make the front driveshaft angle worse, but usually not enough to care. Several variations are available, you can buy spacers or whole new mounts. While I could buy a motor mount spacer, that's not quite my style. I decided to make my own, which turned out to be a quick and easy project. First thing I did was make a template of the motor mount itself, here is a drawing with measurements of the factory motor mounts: 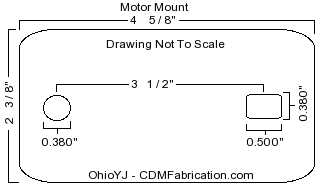
Now most motor mount lifts are 1" of lift, I've seen 2" as well. Almost everyone goes with 1", I decided to go 1.5". Here is the drawing of my motor mount spacer. Those holes in the spacer are drilled 3.5" apart on center (I forgot that measurement in the image). 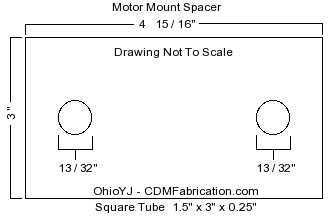
The spacers themselves are nothing more than some thick wall box tube, with two holes drilled in it. 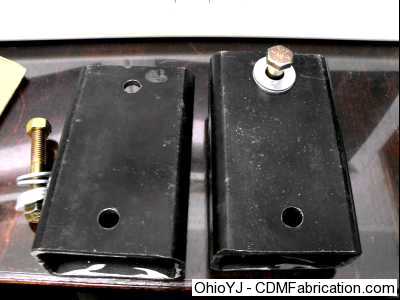
You might notice that the factory mount has a slotted hole on one side, while the spacer I made just has a regular hole drilled in it. The slot might make it slightly easier to line up, but it's not necessary the frame mount has a slot on one side, so there is room for error here. 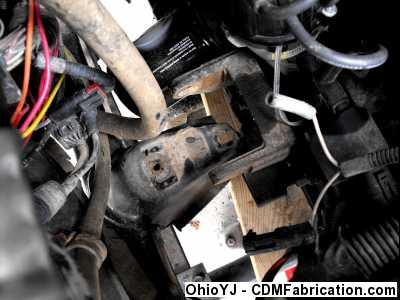
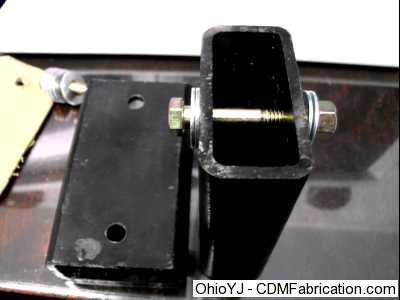
This is the only part that requires more than your "basic" hand tools (see the note below). You'll need to tack weld a bolt on inside the tube. If you don't have a welder, I'd recommend you go talk to a small local exhaust shop, with cash in hand. (Before I had a welder I found on a slow day the guys at the exhaust shop would do small stuff like this for next to nothing, sometimes nothing, especially if you didn't want a receipt for it.) This weld doesn't have to be real strong, it's just to prevent the bolt from turning. *You may have the option to reach in there and hold the bolt with a wrench while tightening the nut if you can't get anyone to tack weld the bolt. I have not tried this method, but I assume you could get in there with a wrench. 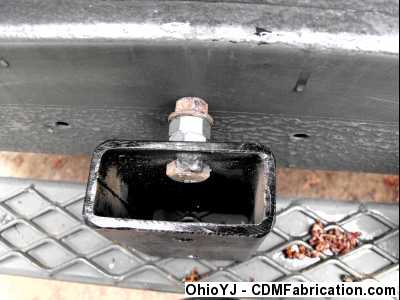
On to the actual install. First thing that needs to be done is loosen all the bolts. Make sure they all come loose before you actually remove anything. You don't want to break a bolt and find you can't move the Jeep again until you figure out how to fix the broken bolt issue. One bolt on each mount is visible/removed from the top side of the engine bay. 
Next you need to loosen the nut on the bottom side of the engine bay. You'll also want to loosen the larger nut that goes through the actual motor mount itself. 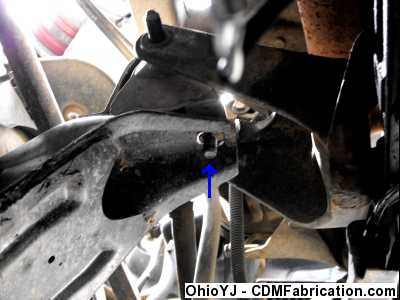
Next the transmission mount and anti-torque mount nuts must also be removed. 
Finally before you move the motor, unbolt the fan shroud from the radiator and just let it rest on the fan. 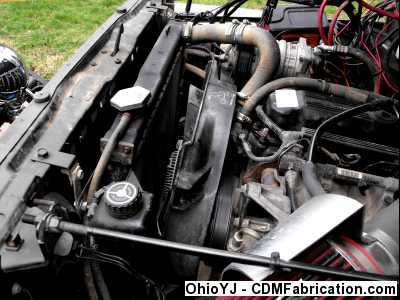
Now using a block of wood, to spread the load out across the oil pan, carefully jack the motor up. At first you want to take it up just enough to take the load off of the motor mount bolts, so they can be removed. Then jack it up some more to take the mounts out. Once the mounts are out, you can bolt the mount to the spacer, then reinstall the mount. You'll need some longer bolts, the bolts and nuts used on the mount are a M10 x 1.5, the length will be determined by the size of the spacer you use. It will take a combination of pry bars and screw drivers to get everything to line back up, you'll most likely need a helping hand for this. Below is a mount and spacer reinstalled. Take your time to make sure you everything has clearance, you will most likely find you need to clearance things on the passenger side. 
It's not a huge difference, but it doesn't take much. Below is an image without the MML: 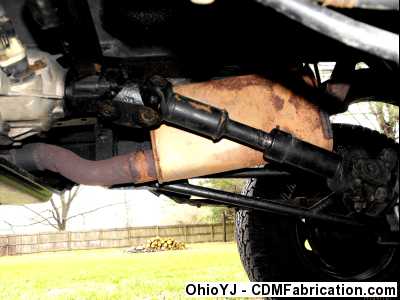
Here is with the MML installed: 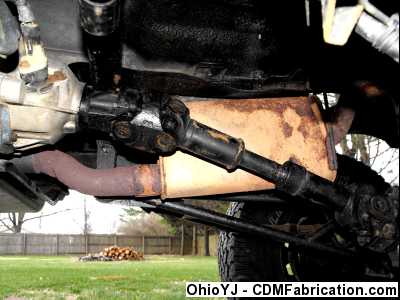
© Copyright 2006 - 2025 Mike Lee
|
|
|