
|
|||
|
Jeep FAQ How-To Articles Quick Reference Product Reviews My Buildup Random Home |
Replacing a cowl seal is more work than it would first seem just due to the amount of prep work that needs to be done before you can install the new seal. If your windshield has never been folded down better start spraying it with PB Blaster well in advance just to make sure you don't have any problems. I used a rag under the hinge, and used a straw to spray the hinges down everyday for a week, the rag keeps the PB Blaster from getting on the paint below the hinge. Start by removing the lower windshield brackets on the dash: 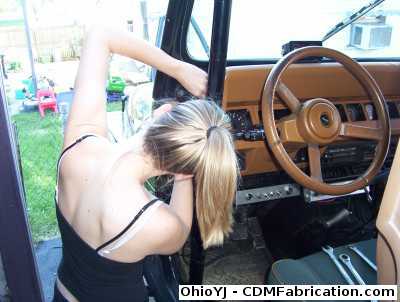 If you'd like to replace the torx bolts with regular hex heads, the top two are 5/16 - 18 1" long, while the bottom bolts are 3/8 - 16 - 1" long. 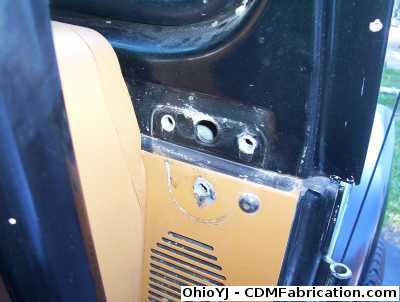 Once you have removed both sides remove the two bolts on the roll cage going into the windshield frame (Those bolts are also 5/16 -18 - 1" long): 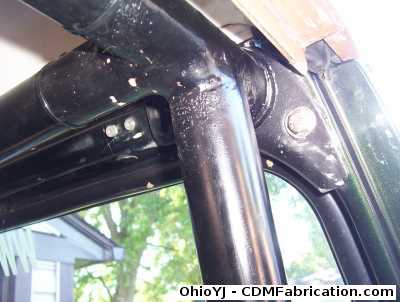 With any luck your windshield frame will just fold forward, don't force it and don't try to do it quickly. Fold it down gently if it doesn't want to just fold down, gently move it back and forth until it frees up, you can also try spraying it with some more PB Blaster while you are trying to move it. 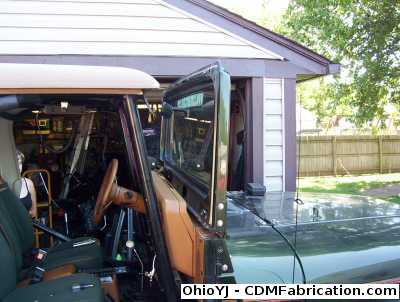 All along the seal you'll find phillips head screws, they aren't exactly fun to get to with the dash in place, but you can use a stubby screw driver to do it. I've also used a screw driver bit and a ratchet to get to them. 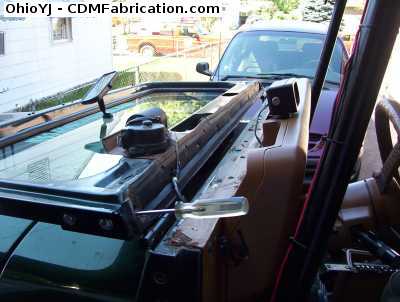 Now here is where I was a little surprised, I figured I'd remove the screws and just pull the seal out. Turns out the seal is glued to the windshield frame. Pull it out, its going to rip in places. After you have it out its time to start scrapping all the old polyurethane adhesive off, take your time to make sure you get it all clean. Surface prep is key to getting the new adhesive to stick good. 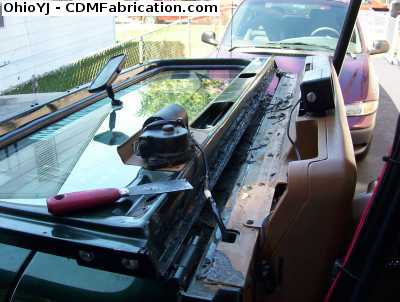 Now you'll notice all the rust there too, and I can't have that. So I also decided to tear everything apart some more to make sure I had all the rust taken care of. After pulling the dash back I found there was no rust, so that part was fine. 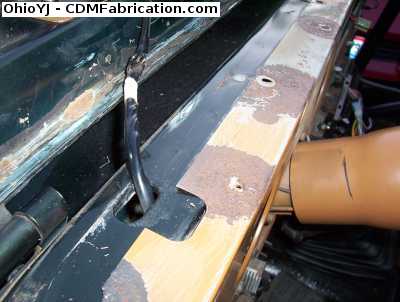 - - This step is completely optional - - Since I was planning on putting a new radio in, I wanted to make sure no water could get in. So I ran a bead of regular black silicone across where the dash set to keep water from being able to seep between the dash and the tub. Those bolts are 1/4 - 20 - 1" long if you care to remove the torx bits in the dash. After you run the bead of silicone make sure you quickly bolt the dash back to the tub. 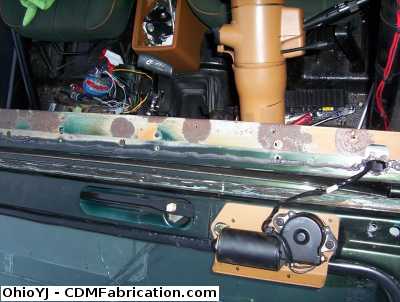 - - End Optional Step Do Everything below - - Once you have everything cleaned, and all the old adhesive removed, be sure to primer and paint the areas where you might have scrapped or sanded through the paint, don't want any other rust forming. I didn't have anyone to take the pictures of the following steps, and I had to move quickly so you'll just have to follow the instructions from here. You'll need a tube of polyurethane adhesive, and a caulk gun. Prior to this step you'll want to lay your new cowl seal out to make sure it lays flat. I fished the cowl seal underneath the wiper motor wiring, and pulled it back away from the windshield frame so I could run the adhesive. I ran three beads of polyurethane across the bottom of the windshield frame. First I ran one down the seam of the windshield frame, making sure to fill the seam with adhesive to help seal out water, then ran a bead down the center of the windshield frame in the corner, then I ran a bead across the windshield frame where the very inside edge of the seal would be. Now you need to quickly put the new cowl seal into place. Its going to look way too short, but don't worry. Pick a side to start at, and put in the first screw. Then stretch the seal enough to put the second screw in, then pull on the seal some more and put the third in, and so on, all the way across. Once you have all the screws in its time to put the windshield up so the seal can compress and the glue can dry. DO NOT glue the cowl seal to the tub side, it gets glued to the windshield frame ONLY. You'll probably find that you need the roll cage bolts to pull the windshield frame back because the new seal is so much thicker. Bolt it all back together, and leave the windshield folded up for at least a day for the adhesive to dry. The edge that shows outside may not lay flat for a day or so, but it will settle out.
© Copyright 2006 - 2025 Mike Lee
|
|
|