
|
|||
|
Jeep FAQ How-To Articles Quick Reference Product Reviews My Buildup Random Home |
For some reason people are always a little concerned about messing with axles, and there's just no reason for it. This writeup is designed to help you understand and install lunchbox lockers. The one I'm installing here is a LockRight, all others are similar, in a Ford 8.8. Below are all the pieces of your typical lunchbox style locker. 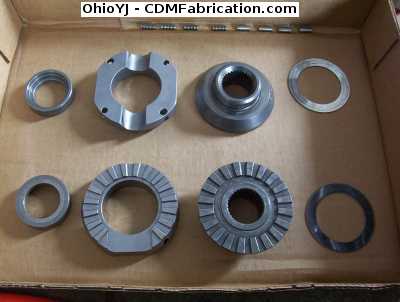
First off, lets explain how these work some. Notice the hole for the cross shaft in the picture below is not round. The springs included with your locker, are used to hold the drive plates to the side gears, so they sort of default to the lock position. They ARE NOT what makes the locker lock. You can easily collapse these springs by hand, they just hold things in place. When you give the Jeep gas, the cross shaft is wedged forward or backward in that oval shaped hole forcing the drive plates against the side gears, so they can not unlock. 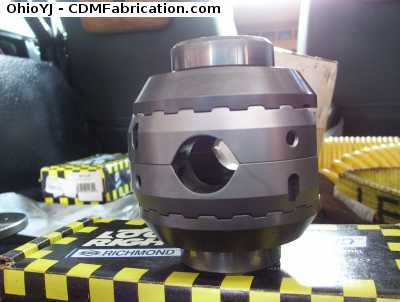
Here is another picture but with the cross shaft in the hole, you can see there is some room for the cross shaft to move in there. Now since the cross shaft can take a beating, it is recommend that you upgrade to a heavy duty cross shaft. 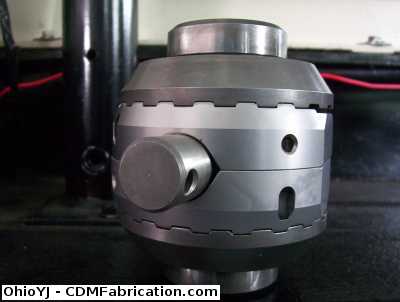
Before we go any further I'll recommend you get an old pair of gloves out. Rear axle parts have all sorts of sharp machine edges. They won't cut you bad, but if you do this without gloves, you may find that you end up with all sorts of fine cuts all over your hands. Start by breaking the lug nuts loose, then jack the Jeep up, and get it on jack stands, then remove the tires. Drum brake axles will need the brake drums removed. Rear disc brake axles will need the calipers and rotors removed. If you are working on a front axle, the brakes and bearings must be removed. If you are working on a newer Dana30 or Dana44 front, use my changing wheel joints writeup to remove the wheel bearings and such. If you are working on an old school manual hub vehicle, use my manual hub wheel bearing maintenance writeup, to remove the wheel bearings and such. Now depending on what axle you are working on you may or may not have to remove the ring gear from the carrier. First if you are not familiar with removing the cross shaft, or c-clips in a c-clip axle, please read through my replacing axle seals writeup first. If you are not sure whether you need to remove the ring gear or not, try and remove the cross shaft, if it will come out, you can do the install in the Jeep if you wish, if it won't come out, you need to remove the ring gear, which also means removing the carrier from the axle. If you cross shaft comes out, skip down to the actual install. Don't worry removing the ring gear carrier from the axle isn't a big deal. First thing to do is break all the ring gear bolts loose. Here's a tip, break the ring gear bolts loose with the carrier in the Jeep, put the Jeep in gear, break a couple bolts loose, put it in neutral, rotate the ring gear, break a couple more loose, keep going around till they are all loose. 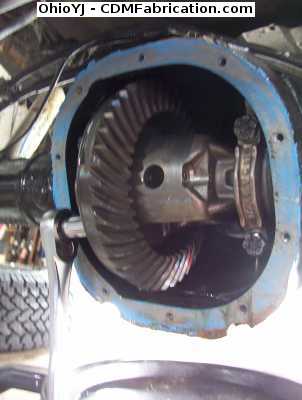
Next make a note of how the bearing caps are installed, typically they will have an arrow on them, which traditionally points outward. Unbolt the bearing caps, and set them aside, make sure you keep them on the same side they go. The left side needs to go back on the left side, right side on the right side. Now pull the carrier out, it can be stubborn, and be ready its not light, and you'd rather not pull it all the way out at first. There will be shims on the left side and right side of the bearing. You need to keep these shims on the same side they where originally. As long as you keep these shims straight there is no gear setup that needs to be done. If you do have to remove the ring gear, make sure you clean up the back side of the ring gear, and both sides of the carrier, you don't want any dirt or burrs in there when you bolt the thing back together. Also remember that those ring gear bolts, and bearing caps have specific torque specs, make sure you use a torque wrench on them. 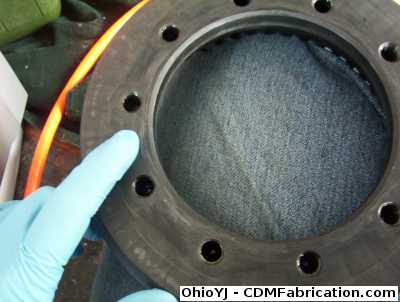
Finally time to get to the real install. Please note that I've removed the carrier for demonstration purposes, and to replace mine, if you cross shaft came out without removing the ring gear, you can do the install in the Jeep. Also note that I'm installing this locker like a non c-clip axle, for demonstration purposes (better pictures). You can do it like this, for c-clip axles but its a slightly more difficult than installing the pieces one by one in the Jeep. Since I'm working on a c-clip axle I'll explain how these pieces go together. The clip on the left is held in place by that spacer cup in the center, which goes in the center of the drive plate. Notice the space on the drive plate where there are no teeth, this where you slide the clip in once everything is installed. 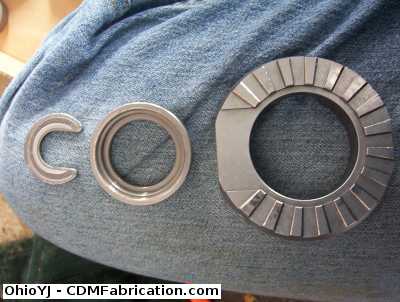
Here is how everything will be in it's final installed position: 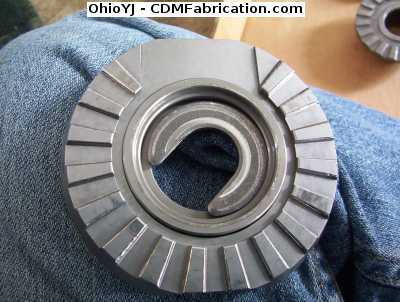
Ok first thing to do is install the thrust washers to the side gears. The thrust washers are the little thin shim like things, on the back side of the factory spider gears. They must be used, so if yours are damaged, or missing, you need to order some before you go any further. 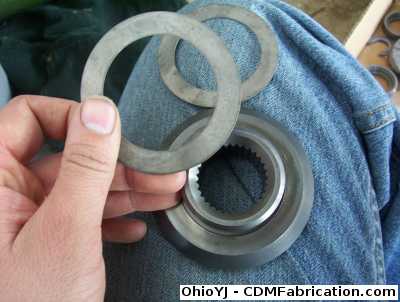
Then set the side gear in the carrier. 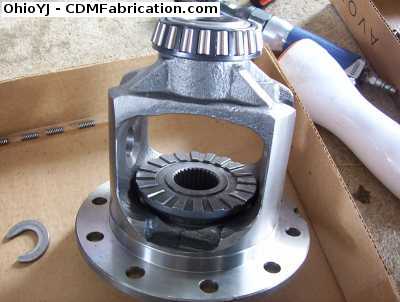
Next it's time to install the pins to the drive plates. Dab the pins in grease, the grease will help hold them in place. 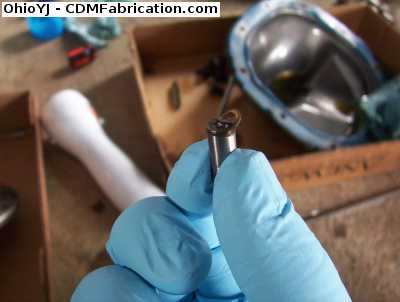
Notice the drive plate has two oval shaped holes (one visible on the left) and two round holes (one visible on the right). One pin will go in each oval shaped hole from the bottom. 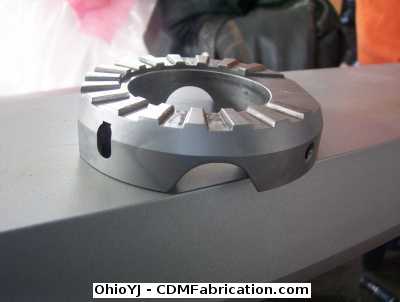
Set the drive plate in the carrier. If you are doing this in the Jeep, don't be afraid to use some grease on the teeth of the locker to help hold the pieces together during assembly. You'll notice I used some extra grease on the drive plate after I slide the pins in to help ensure they stayed put. Now if you are working on a c-clip axle and the carrier is in the Jeep, install one axle and c-clip before even installing the drive plate, this will make it so you only fight with one c-clip later. 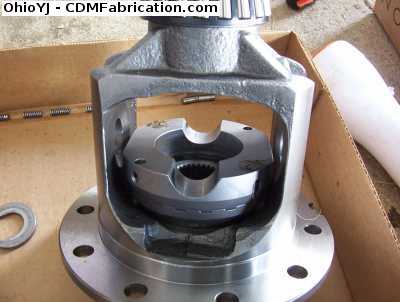
Next since I'm dealing with the c-clip axle, its time to install the cups for the clips. I've smeared some grease on the cup to help hold it in place as well. 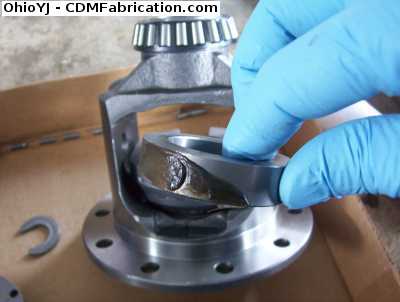
Installed, notice how the grease holds the cup flush with the drive plate. 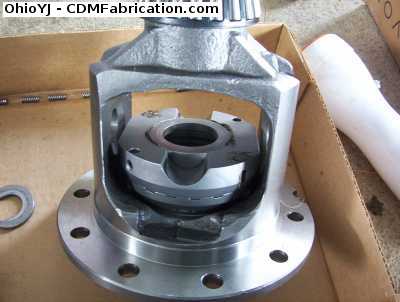
Now install the other side gear. 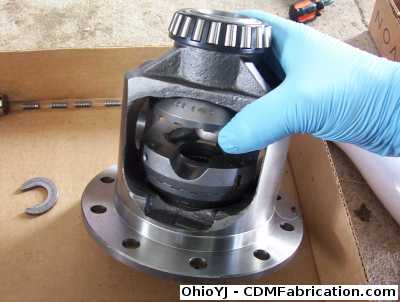
Now when you install the other drive plate, you'll need to already have the c-clip cup in the center of it when you slide the drive plate in. 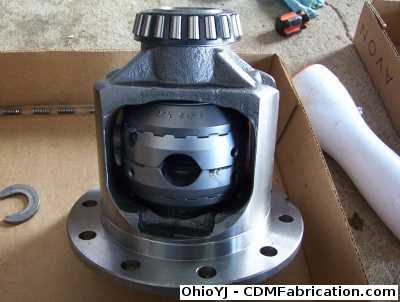
Now I'm temporarily installing the center pin to hold the locker still while I' install the center pins, and springs, this will prevent the locker from rotating in the carrier. Again I'm doing this similar to the way you would install a Dana30, or a non c-clip axle, if you are working on a c-clip axle, you'd be a little better off to already have the c-clips re-installed before doing this. 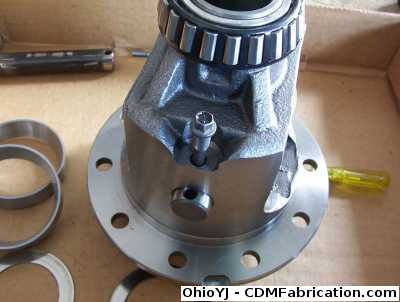
Now take a small screw driver and slide the pins over into the drive plate on the opposite side. Repeat this step for all four pins. 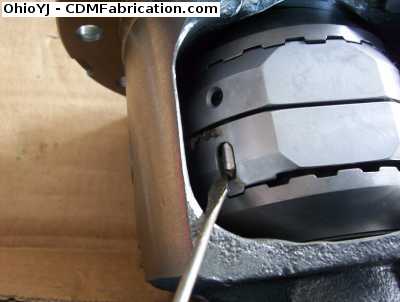
Time to install the springs. Now all lockers are a little different, most use a double spring though, one smaller spring inside a larger one. If you have double springs, some grease will help hold them together while you are installing them. 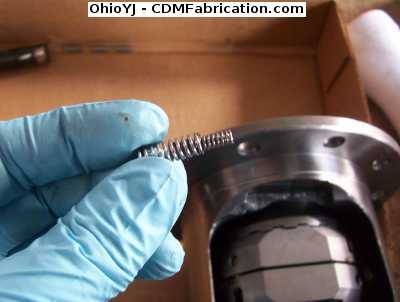
Slide the springs in through the oval shaped holes, you can get them in by hand typically. 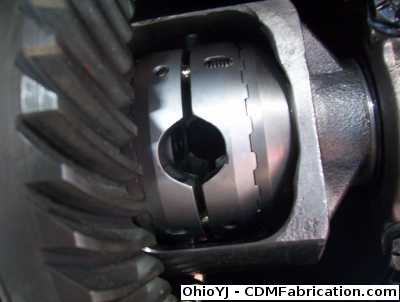
Now if you are working on a c-clip axle like me, you're in for a treat. Its time to install the c-clips. Hopefully if you installed one axle like I suggested above, you only get to fight with one of them. Remember that spot in the drive plate where there aren't any teeth, thats where you get to slide the c-clip through. If you have already installed the pins and springs, use a small screw driver to gently pry the drive plate and side gear apart, then make sure that c-clip cup is pushed all the way towards the center. Then you can slide the c-clip in, dab some grease on it, especially in the center, to make sure it stays once you get it back where it should be. 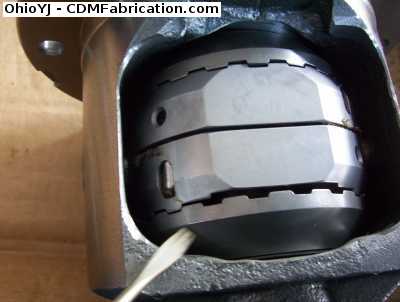
When you are finished, see my changing differential fluid writeup for tips on re-installing the diff cover.
© Copyright 2006 - 2025 Mike Lee
|
|
|