
|
|
|
Jeep FAQ How-To Articles Quick Reference Product Reviews My Buildup Random Home |
Next in my do-it-yourself write-ups, is changing wheel joints. So what's a wheel joint? It's the u-joint in the front axleshaft. Changing a wheel joint is very similar to changing any other u-joint. However since some of us leave their wheel joints in for 125k miles :D , they can be stubborn to remove. First jack the Jeep up, and put both sides of the front axle on jack stands. Then remove the wheels/tires. Now since my pictures of removing shaft on a Dana44 won't help 90% of you out there, I have some drawings to show how to remove the axle shaft. First decide if you want to change the wheel joint with the hub assembly still attached or not. Many people leave them attached just so they don't have to mess with the hub nut. I prefer to separate the hub assembly from the axle shaft, just makes things easier. If you wish to remove it, have some hold the brake pedal down, and use a large breaker bar to break the hub nut loose. Next take the two caliper bolts off and pull the brake caliper off. Tie the caliper up, set it on something, just don't let it hang by the brake hose. The rotor should just slide right off (whether you remove the hub nut or not, it does not hold the rotor on). Many times it can rust and seize on the hub assembly, so it can take some persuasion to remove. I've hit them with a dead blow hammer (don't use a metal hammer), to knock them loose, I've used heat around the center of the hub, PB blaster, and I've even stuck a screwdriver in the fins to pry the rotor outward. The less aggressive you are with it the better, don't want to warp it. Once you have the rotor removed, its time to remove the hub assembly bolts. There are three, if they are still factory bolts, they should be twelve point bolts. So you'll need a 12-point socket, or a wrench to remove them. The bolts are on the inside of the steering knuckle, as shown in this picture: 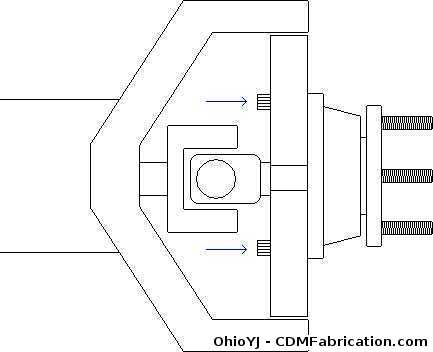 Once you've removed the three hub assembly bolts, if you are extremely lucky, your hub assembly will just pull right out. However the odds of this happening aren't very high. So I'll show a couple of other methods here. First choice is to remove the three bolts completely, and place a socket on the axle shaft ear, so the socket will contact the axle housing when the wheel is turned. Then have some turn the wheel, it should pop the hub assembly out. 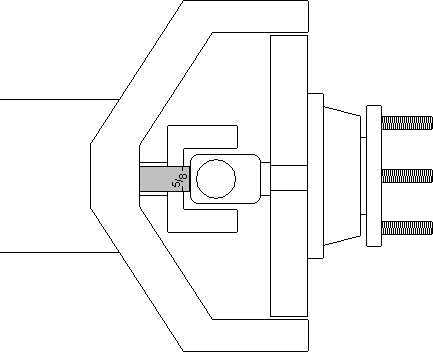 Your second choice is to loosen the bolts, so they stick out roughly 1/8" to 1/4", then place a deep well socket on the bolt head, and again turn the wheel so it contacts the axle housing. 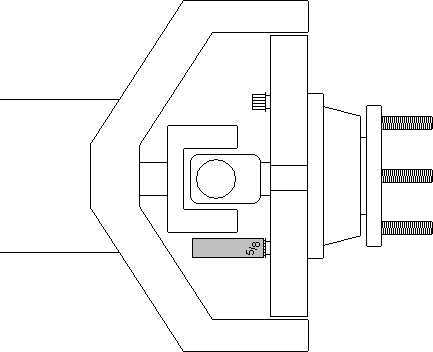 Once you've gotten the hub assembly popped loose, carefully, hold the inner shaft up as you pull the axle shaft out so you won't damage the seal inside the differential. Also this will keep the splines out of any mud that has accumulated in the axle tubes. Have a pan ready, you shouldn't loose hardly any fluid, but some may come out the tube when you remove the axle shaft. First thing to do is to remove all the inside lock rings. Your looking for these clips, just on the inside of the ear of the axle shaft:  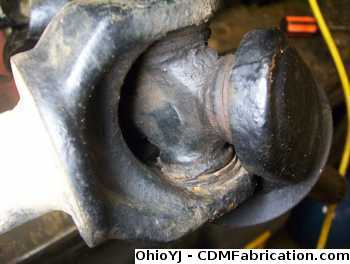 Using a flat head screw driver and smacking it with a hammer, you can get the clips freed: 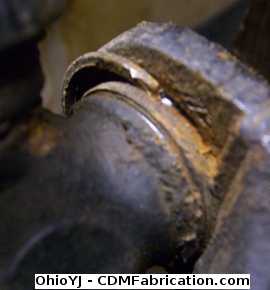 If you have access to one, an air chisel will pop the lock rings off like nothing: 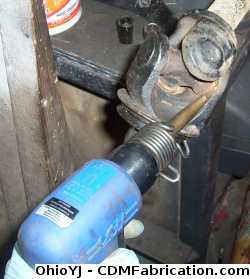 After you have removed all four lock rings, its time to start removing u-joint caps. You have several options here. You can use a socket (one you don't care about), and a large hammer to beat the caps out. 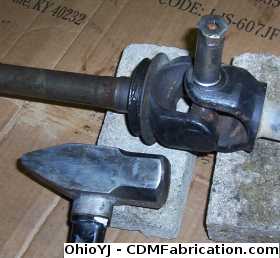 Now I'm gonna take the easy way out, and use a ball joint press. These can be rented from AutoZone. Harbor Freight sells them at a reasonable price too. The ball joint press will make this job much easier. 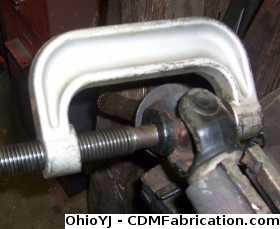 The wheel joints I'm changing here or from a Dana44 that was made in 1980, so they were rather stubborn. If you aren't having much luck with the ball joint press, tighten it down tight, then use a big hammer and actually smack the ball joint press. 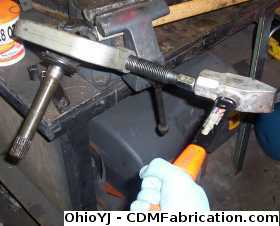 Many times you will have to tighten the ball joint press, smack it with a hammer, tighten the ball joint press, smack it with a hammer. It can be a long drawn out process. You may hear popping/cracking noises as the u-joint comes out, so don't worry if it sounds bad. Once you have pressed the u-joint outwards as far as it will go, use a large pair of channel locks to rotate the caps, while pulling upwards, they should come out fairly easy. If they are really being stubborn, go ahead and use vice grips to remove the cap 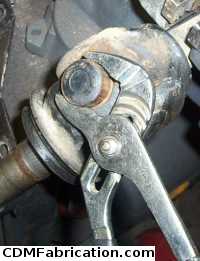 Notice in this picture I've coated the U-joint cap in a thin film of oil, it makes pressing it back through much easier. 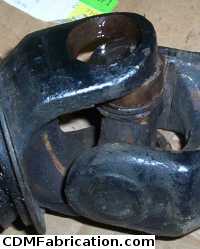 DO NOT just jump back into using the press to push the u-joint back through the other direction. Do your best to line the u-joint up, and start beating the u-joint cap back through with a hammer. Once you get it started, you can switch back to the press. 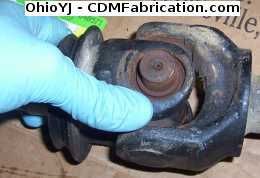 Once you get the cap pressed through, remove it, and you can remove that side of the axle shaft. 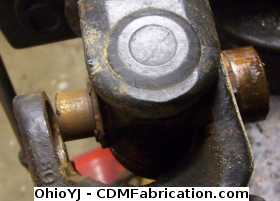 Repeat this process to remove the other two caps left on the u-joint. Now you are ready to install the new wheel joint. Again, use a thin film of oil on the caps to ease the installation process. Hold the u-joint up into the cap, and tap it in with a hammer. 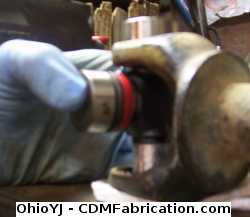 Once you have the cap in on one side, go ahead and install the new lock rings. They should pretty much just press on. 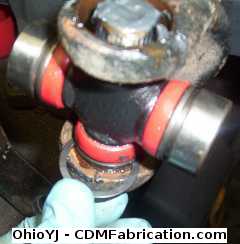 However it never hurts to give them a little tap with a screw driver just to make sure they are seated fully. 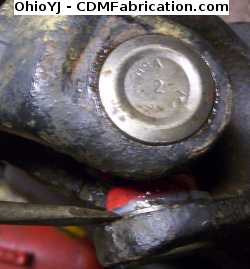 If your wheel-joint is greaseable you should grease it after installation. I normally use greaseable joints, but not on the wheel joints, these are solid so I had to pack grease on each end. Most companies skimp on the grease, so make sure you have plenty in your brand new u-joint. 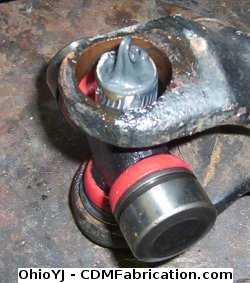 Time to make things look pretty... While I had the axle shaft out, I went ahead and roughed it up, cleaned it up with brake clean, and painted it, just to help keep the rust to a minimum.  |
| © Copyright 2006 - 2024 Mike Lee | |