
|
|||
|
Jeep FAQ How-To Articles Quick Reference Product Reviews My Buildup Random Home |
Well the next how-to in my do-it-yourself series, is rebuilding a CV driveshaft. Even if you don't have a CV driveshaft, it will at least show you how to change a U-joint. Many people take their CV driveshafts to driveline shops to be rebuilt. However this really isn't necessary. Rebuilding a CV shaft isn't any big deal. The main components you have to worry about with a CV driveshaft is, 3 u-joints (2 u-joints on the CV side) and a center ball assembly. The u-joints you can get anywhere. AutoZone and Advance typically have to order the center ball assembly, I've found most Napa's stock them though. If you do need a new centering ball assembly, they typically are under $40. Time to start disassembly. Start by removing all the clips from end caps of the u-joints. Using a pair of needle nose pliers, squeeze the clips to together and pull them upward. 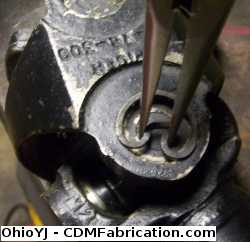 If the clips don't want to come free, try using a pair of channel locks on one side of the clip, and the outer edge of the driveshaft. 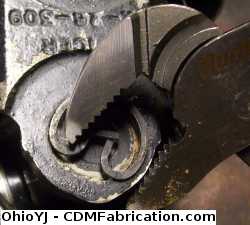 Now rather than beating these U-joints out, I'm using a ball joint press. You can use the socket and big hammer method, or a socket and a large vice, but I've found a ball joint press makes the entire job much easier. I rented the ball joint press from AutoZone, I've heard Harbor Freight sells a nice kit, for a reasonable price too. In this picture I'm using the ball joint press to push the U-joint out of the shaft. When working on a CV, start with the cap that is on top in the picture, on the side the clamp is on. 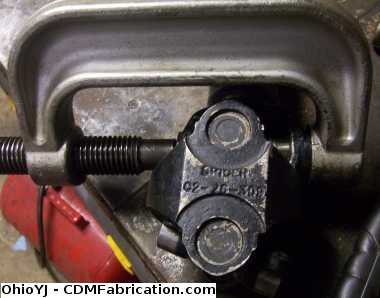 The U-joint will only press out so far. then on the other side, use a large pair of channel locks to rotate the cap while gently pulling upward on it. 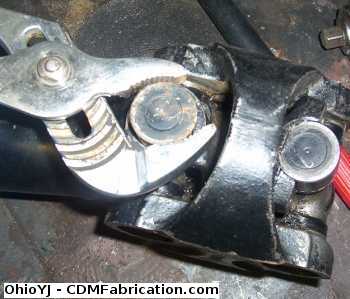 The cap should pull up and out fairly easily. If it is really be stubborn, get the vice grips out. No you will have to beat the U-joint back through the other side. DO NOT just use the press right away. Use a hammer to beat the U-joint back into the other side, once you get it started and am sure the cap is straight in the CV, then use the press to push the U-joint out the other side, so you can pull the other cap out. Now here is where you have to be careful. One thing to watch is there is a spring inside this end of the CV: 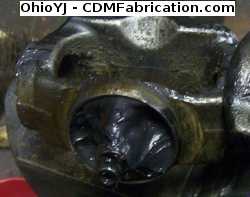 Next the centering ball has needle bearings in it. You'll notice I've packed the centering ball with grease to make sure none of them could fall out. 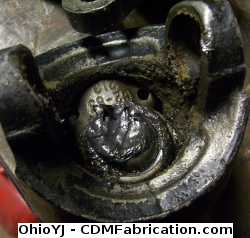 Time to press the last U-joint out:  Once you have everything out, inspect everything for any abnormal wear. Most of the time the centering ball can just be repacked with grease, and all is good. There are needle fittings for a grease guns on two sides of the centering ball. However I've never had much luck with them, so I actually pack the center of the ball full of grease, then using my thumb to plug the hole on the back of the center ball, I force the center ball back onto the driveshaft side, this forces grease into the the centering ball assembly. Its sort of difficult to explain, but fill the centering ball full of grease, then put the two pieces picture below together, and you will see what I mean: 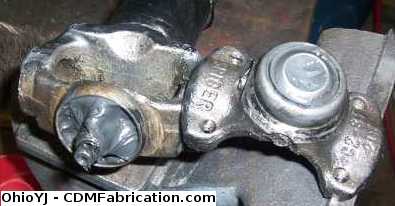 Once you get fresh grease in the centering ball assembly, it should have a little resistance to move the centering ball, sort of stiff. Now its time to start reassembly. Start with the U-joint second U-joint on the shaft first. First stick the U-joint in place with no caps. Just as a tip, put a drop of oil on the cap and smear it around (it only takes a drop or so). That little bit of oil will make the U-joint cap go in a ten times easier. Lift the U-joint up, and set the cap on top of it. You'll need to hold the U-joint up in the cap, to keep the needle bearings from falling out when you start beating on it. Tap the cap in with a large hammer, it should go in pretty smoothly, try your best to keep the U-joint partially in the cap as you are smacking it to keep the needle bearings in place. 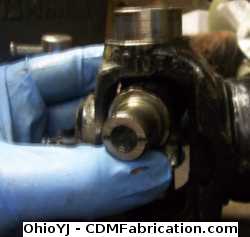 Once you get the cap flush with the top of the shaft, use a socket (that you don't care about destroying) to beat the cap the rest of the way in. 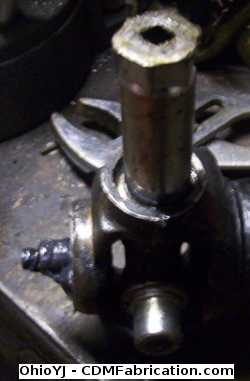 Once you get the cap in, go ahead and put the clip in on the one side. Then repeat the above process to install the other cap. 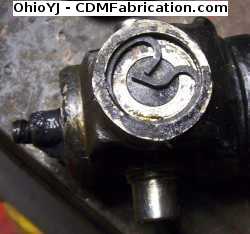 Once you have the middle U-joint in place, its time to put the center ball assembly back in. Same process insert the U-joint without the caps, then smack them back into place. 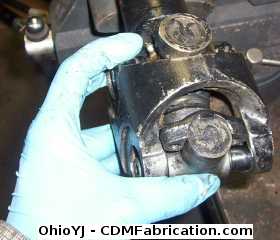 Hopefully when you are all done your CV joint is nice and tight, if you rotate it up, it should hold there, it shouldn't freely move around, there should be some resistance to its movement. 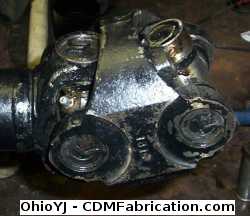 Don't forget to grease your U-joints if they are greaseable, even if they are new, they still need extra grease added to them.
© Copyright 2006 - 2024 Mike Lee
|
|
|